

Common Mistakes in Contrast Therapy Prep
- Patrick Frank

- 23 hours ago
- 8 min read
Contrast therapy alternates between heat (like saunas) and cold (such as plunges) to improve blood flow, aid recovery, and boost mood. While its benefits are clear, preparation is key to avoid common missteps that can reduce its effectiveness or pose risks. Here's what you need to know:
Hydration: Drink 16 oz of water 30 minutes before and replenish electrolytes after.
Nutrition: Avoid heavy meals and alcohol for at least 2 hours prior.
Timing: Post-workout? Wait 30–60 minutes for recovery or 4+ hours for muscle building.
Gear: Wear a plain swimsuit (no metal), bring a microfiber towel, loose clothes, and a water bottle.
Environment: Keep sauna and plunge close together (under 60 seconds apart) and use anti-slip mats.
Avoid these mistakes:
Jumping into extreme temperatures without easing in.
Skipping hydration or rest between rounds.
Poor timing between heat and cold phases.
Safety first: Consult a doctor if you have health conditions like hypertension, Raynaud's, or pregnancy. Listen to your body - persistent dizziness or numbness means stop immediately. After your session, let your body warm naturally for 5–10 minutes and hydrate well.
Don't Make These 3 Common Cold Water Therapy Mistakes
sbb-itb-10d9b3e
How to Prepare for a Contrast Therapy Session
Focused preparation can help you get the most out of your session and support faster recovery.
Hydration and Nutrition
Start by drinking at least 16 oz of water about 30 minutes before your session. Afterward, replenish lost electrolytes - like sodium, potassium, and magnesium - to avoid issues like headaches, dizziness, or muscle cramps. An easy way to do this is by mixing an electrolyte packet into water once you're done.
Avoid heavy meals and alcohol for at least two hours before the session. If you're feeling hungry, a light snack an hour or two beforehand is perfectly fine.
Timing matters, too. For muscle recovery, aim to schedule your session 30–60 minutes after training. On the other hand, if you're focused on muscle building, delay the cold plunge for several hours. This prevents the cold from reducing the inflammation that helps build muscle.
Once you're set with hydration and nutrition, it's time to gather what you'll need for the session.
What to Bring to Your Session
For the session itself, all you need is a plain swimsuit - avoid anything with metal hardware or heavy padding, as metal can heat up in the sauna and become uncomfortable. Afterward, pack loose, breathable clothing to help your body relax as it cools down.
A reusable water bottle is a must. Sip throughout the session to stay hydrated, instead of waiting until the end. Also, bring a microfiber towel, which is more efficient than a regular cotton towel for handling multiple dips into the cold plunge.
Item | Why It Matters |
Plain swimsuit (no metal) | Metal heats up in the sauna |
Loose post-session clothes | Helps maintain relaxation during recovery |
Water bottle | Keeps you hydrated throughout the session |
Microfiber towel | Handles multiple dips better |
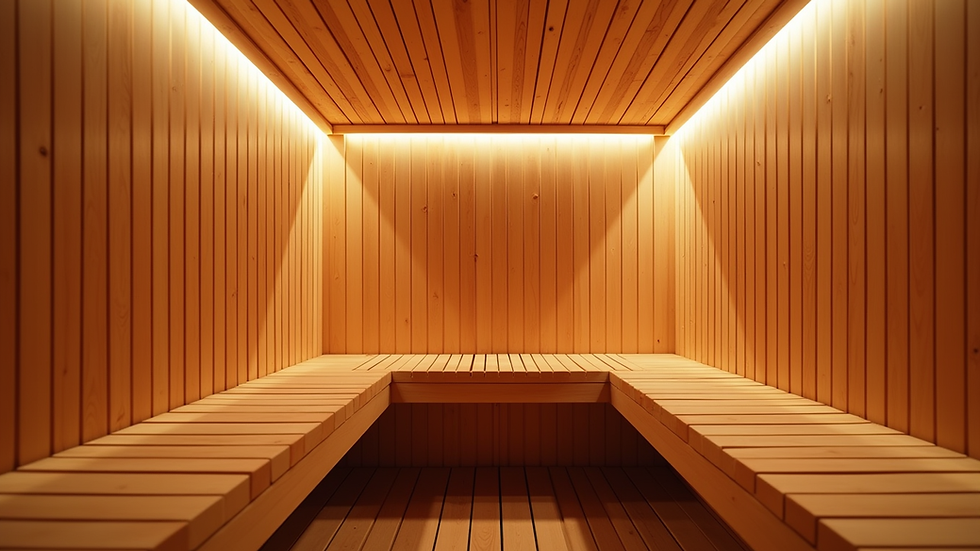
Setting Up the Right Environment
Once you're prepared, it’s important to create the right environment for your session.
The key factor is proximity. The sauna and cold plunge should be just a few steps apart, allowing you to transition in under 60 seconds. This quick shift between heat and cold is essential for maintaining the cardiovascular contrast effect that makes the therapy so effective.
Privacy and minimal distractions are also critical. This allows you to focus on your breathing and tune into your body during the cold immersion. For example, Conscious Body Recovery in San Diego offers private rooms designed for individuals, couples, or small groups. Their setup includes infrared saunas, cold plunges, warmed towels, and refreshments, creating a space where you can fully immerse yourself in the experience.
Lastly, don’t overlook safety. Place anti-slip mats around the cold plunge area to prevent falls, as the floor can get slippery quickly. A small precaution like this can save your session from an abrupt end.
Common Contrast Therapy Preparation Mistakes
Even with the right equipment and plenty of water, certain missteps can undermine both the safety and results of contrast therapy. Here are some pitfalls to avoid.
Jumping Straight into Extreme Temperatures
A common rookie mistake is diving into extreme temperature shifts too quickly. For example, going straight from a 180°F sauna into a 45°F cold plunge can put unnecessary stress on your cardiovascular system.
The shock of sudden cold can cause gasping, hyperventilation, and a sharp rise in blood pressure as your blood vessels constrict rapidly. If you're just starting out, aim for 130–150°F in the sauna and 50–59°F in the cold plunge. Limit your heat exposure to 2–3 minutes and your cold phase to 20–30 seconds during your first few weeks. The goal here isn’t to see how much you can endure but to create a vascular pump - the alternating expansion and contraction of blood vessels that helps flush out metabolic waste.
Skipping Hydration and Rest Between Sessions
Failing to hydrate between sessions is another big mistake. Without enough fluids, you risk dizziness, cramps, and cutting your session short before you’ve reaped the full benefits.
Equally important is taking time to rest between rounds. Skipping breaks means your cardiovascular system stays under constant strain, which can be counterproductive. A short pause after leaving the cold plunge allows your nervous system to reset, preparing you for the next cycle.
Poor Timing Between Heat and Cold Phases
Timing transitions correctly is crucial for both safety and effectiveness. For instance, taking a 30-second pause after leaving the sauna before entering the cold plunge can lower your peak heart rate by about 12 bpm without reducing the benefits of the therapy. Skipping this pause doesn’t make you tougher - it just adds unnecessary stress to your heart.
Additionally, cold exposure too soon after strength training - within 4 hours - can interfere with muscle protein synthesis and hinder muscle growth. If building muscle is your main goal, give your body time to recover before jumping into a cold plunge. For evening sessions, make sure to finish the cold phase at least 3 hours before bed, as ending on cold too close to bedtime can delay sleep onset by around 24 minutes and reduce deep sleep by 18 minutes.
Transition | Recommended Timing | Why It Matters |
Sauna → Cold Plunge | 30–60 seconds | Reduces cardiac strain; allows heart rate to settle |
Cold Plunge → Sauna | 2–3 minutes | Prevents compounding thermal stress |
After Strength Training | Wait > 4 hours | Avoids interfering with muscle growth |
Evening Cold Phase | Finish > 3 hours before bed | Helps maintain sleep quality |
Avoiding these common mistakes can help you maintain a safe and effective contrast therapy routine.
Safety Tips for Contrast Therapy
Paying Attention to Your Body
When practicing contrast therapy, it’s important to listen to your body. Mild skin redness, brief shivering, or tingling sensations are normal and indicate that your vascular system is responding effectively. However, if you experience persistent dizziness, numbness in your hands or feet, or a sudden surge of anxiety, it’s a sign you may have pushed beyond your limits.
Cold immersion can cause norepinephrine levels to spike by as much as 530% in just 60 seconds. If you feel overwhelmed, step out of the cold immediately and focus on slow, controlled breathing. Nasal inhales followed by long, steady exhales can help activate your parasympathetic nervous system, which calms your heart rate. Avoid holding your breath during a cold plunge, as it can dangerously elevate your blood pressure.
Tracking your recovery progress can help you identify these patterns over time. These signals from your body are essential for gauging whether you need to seek further medical advice, which we’ll explore next.
Medical and Skin Precautions
Contrast therapy isn’t a one-size-fits-all approach. If you have any underlying health conditions, it’s critical to consult a medical professional before starting. Certain conditions make contrast therapy particularly risky, including:
Uncontrolled hypertension (above 160/100 mmHg) - not recommended
Raynaud's disease - not recommended due to heightened circulatory sensitivity
Cold urticaria - not recommended
Unstable angina or recent cardiac events (within the past 6 months) - not recommended
Pregnancy - cold plunges should be avoided; sauna use requires approval from your OB-GYN
Age over 65 - a baseline ECG and stress test are recommended before starting
Controlled hypertension - requires medical clearance and adjusted protocols
"The cardiovascular swings during contrast therapy can exceed those during moderate exercise. For most healthy adults this is a beneficial stressor. For someone with undiagnosed coronary disease, it's a risk multiplier." - Dr. Marcus Eriksson, Cardiologist, Karolinska Institute
Taking these precautions ensures that you’re prioritizing safety while reaping the benefits of contrast therapy.
What to Do After Your Session
After your session, resist the urge to jump into a hot shower. Instead, let your body rewarm naturally for 5–10 minutes. This helps maintain the cycling of blood flow and extends the metabolic benefits of the session. Once rewarming is complete, dress warmly and move slowly to keep your circulation steady.
Hydration is key after contrast therapy. Drink plenty of fluids, and consider adding an electrolyte supplement to help prevent headaches or muscle cramps. If you’re planning a session at Conscious Body Recovery in the evening, make sure to finish the cold phase at least three hours before your usual bedtime. Cold exposure too close to bedtime can interfere with sleep by delaying sleep onset and reducing the amount of deep sleep.
Conclusion: Set Yourself Up for a Better Contrast Therapy Experience
To get the most out of contrast therapy, it’s important to stay hydrated, ease your body into the process, manage the timing of heat-cold transitions, and listen to your body’s signals. Following established contrast therapy protocols can also help you stay safe. If you’re new to the practice, try starting with cold plunges at 55–60°F for 30–60 seconds. Research suggests that a total of 11 minutes of cold immersion per week can offer benefits for your metabolism and brain chemistry.
Avoiding common missteps is easier than it sounds once you know what to expect. For example, taking a short air cool-down between the sauna and cold plunge can improve how your body adapts to the shifts in temperature.
If you want a hassle-free way to experience contrast therapy, consider visiting a dedicated facility. Conscious Body Recovery in San Diego provides private suites equipped with infrared saunas that reach up to 170°F and cold plunges set at 40–45°F. Their self-serve setup includes warmed towels, filtered water, and adjustable lighting and scents, so you can fully focus on your session. They offer 25-, 55-, or 85-minute sessions, with options for single visits, packages, or memberships starting at $199 per month.
With the right preparation and environment, you can maximize your recovery and make every session truly count.
FAQs
How many rounds should I do as a beginner?
As a beginner, stick to 2 rounds of contrast therapy. This method allows your body to ease into the process, giving it time to adapt without unnecessary strain. Resist the urge to add more rounds at first - keeping it simple ensures the experience is both safe and effective.
What heat and cold temps are safest to start with?
For those new to this, begin with an infrared sauna session set to about 120°F for 15–20 minutes. Afterward, try a cold plunge with water temperatures between 45–55°F for 1–3 minutes. As your body adapts, you can slowly increase the intensity. Always pay attention to how you feel and make adjustments to stay safe and comfortable.
Can I do contrast therapy on the same day as lifting?
It's recommended to wait 4–6 hours after lifting before starting contrast therapy. This waiting period is crucial, especially if you're aiming for hypertrophy, as it helps avoid disrupting muscle growth and recovery. Giving your muscles this time ensures they recover properly before introducing the therapy.


Comments